Inspiration for all things pretty ♥

Monday, January 21, 2013

Two-Toned Gold Vintage Sweetheart Dress

I found this beautiful vintage looking pillow case while shopping awhile ago and I've debated for some time what I wanted to make out of it. The vintage feel is timeless and I didn't want just a pretty top so I opted for a dress instead. I only had enough fabric to make the front of the dress so I completed the back with a pretty coral colored pillow case that I found while shopping as well.

A two-toned gold vintage sweetheart dress it is. :)


The pillow case I started out with. I cut off the front of the pillow case since the back was just a plain tan fabric.


The sweetheart shape I cut out. I'm completely in love with sweetheart busts. It screams classic elegance.


I hemmed the raw edges.


Then I sewed a crease a little below the bust to give shape to the waist. I pinned the front and back of the dress to the mannequin to audit some loose fabric so I can sew them together.


The back of the dress is a coral colored pillow case with an invisible zipper on the side.


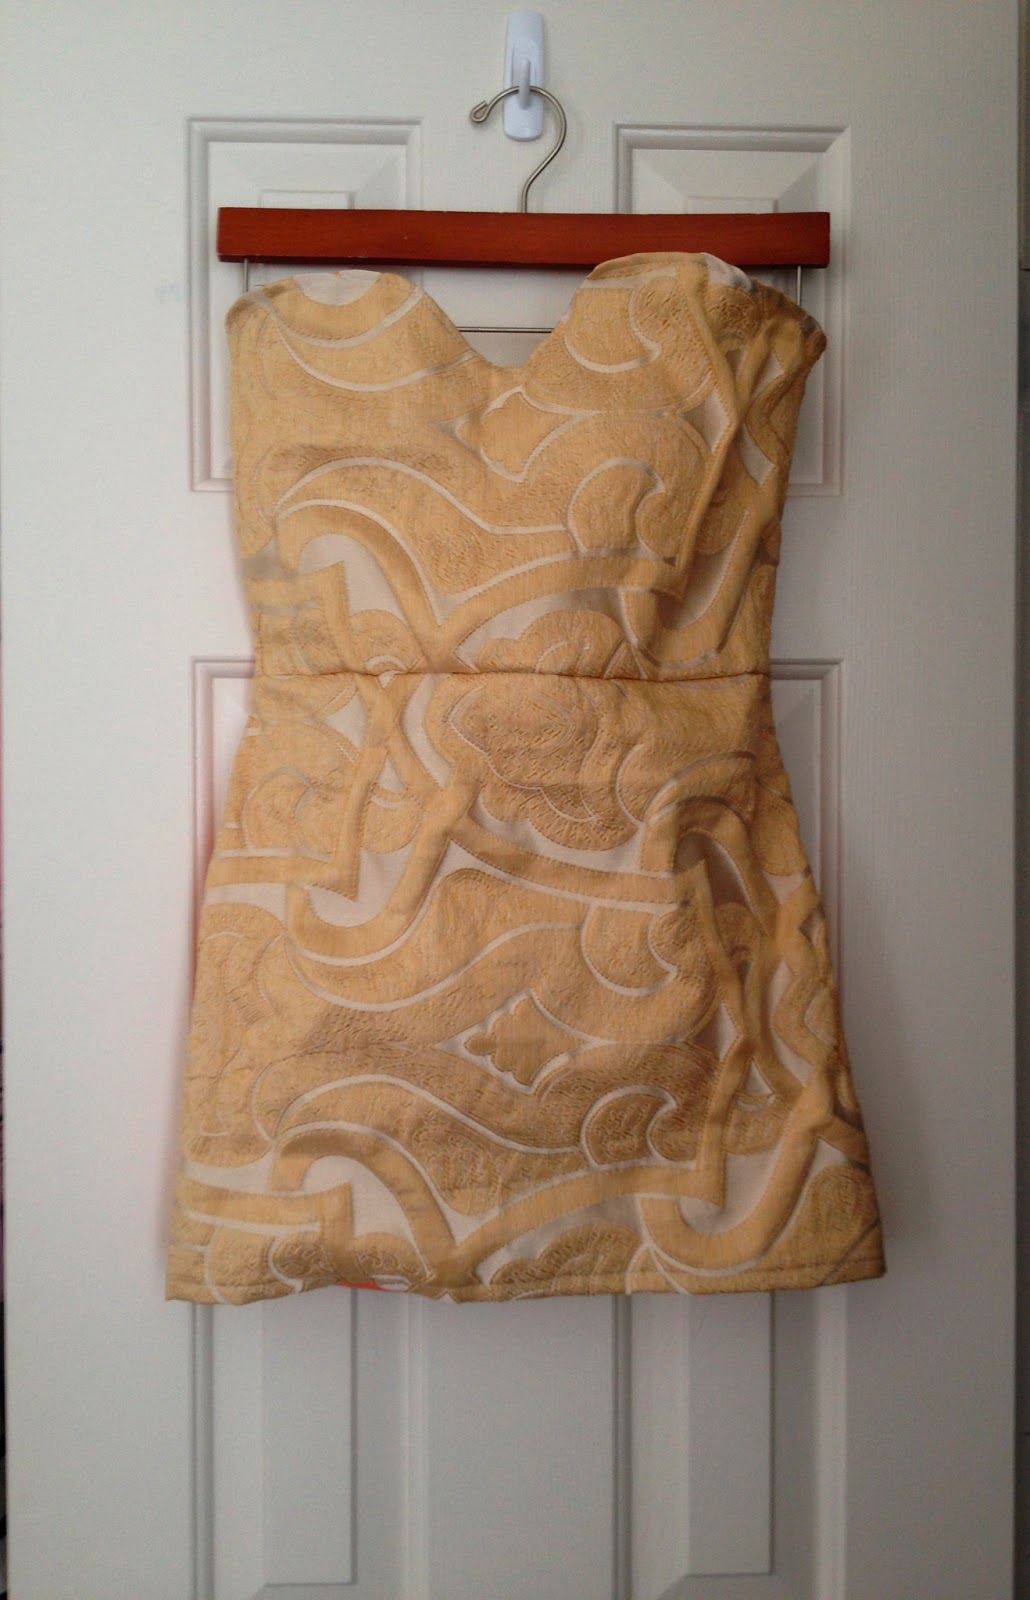
I couldn't pull my finished dress over my mannequin so I had to hang it up. The dress looks more flattering on and has more shape than this shows. The back is also a low sweetheart which adds more of the detail that I love. :)


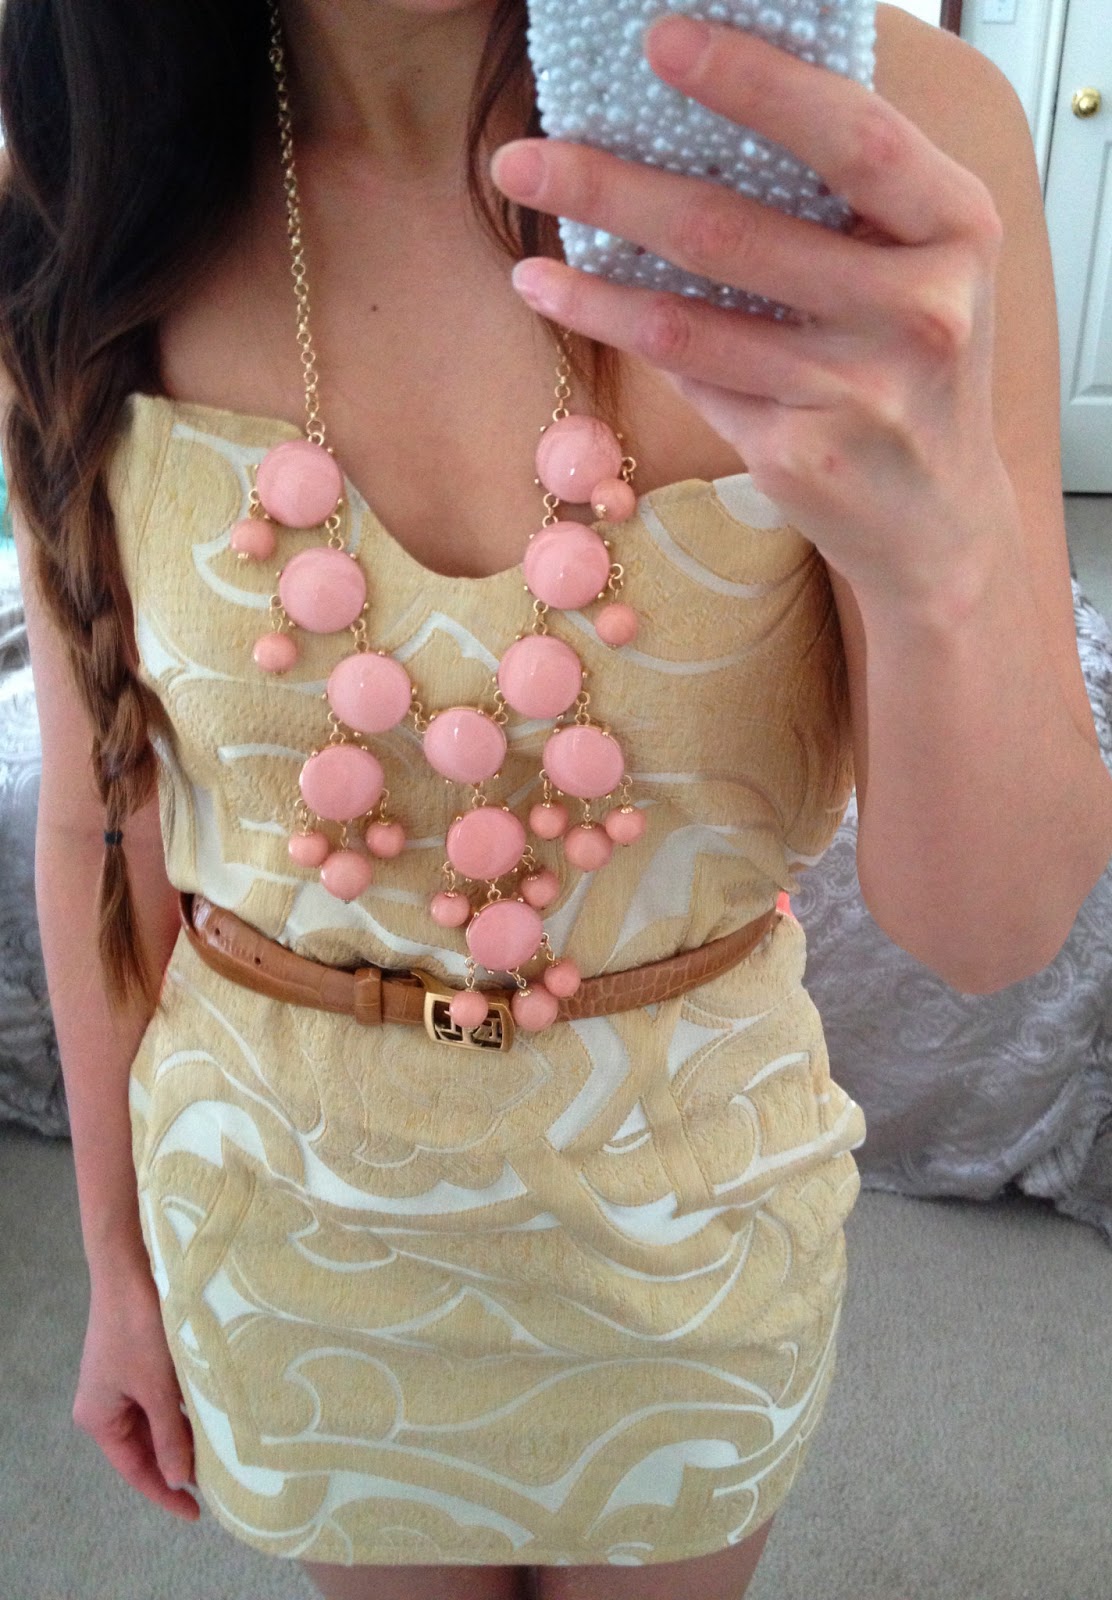
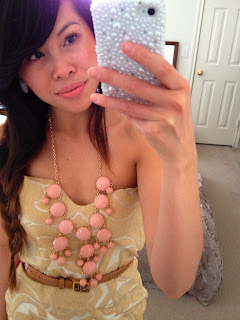
Thee finished dress on! I wore my canvas ivory heels and white rhinestone embroidered earrings to keep the look a little simple. Then I added on a tan belt and my peach bubble necklace to complete the look.


For an everyday look I can simply throw on a cute cardigan over and for a more dressy look a blazer would go perfectly with this dress. I definitely think dresses are my forte. They are so simple to make! :)


Read More

Sunday, January 13, 2013

Ivory Lace Babydoll Dress

Since I laid eyes on this beautiful flowy lace dress I fell in laaahhhhvveee. The lace, the elegance, just everything about this dress moved me. With my imagination I decided to replicate this amazing lace dress with a little twist of my own.


The lace fabric I used was from a window curtain I found for $2. Yes. A window curtain. I'm addicted to recycling things as you can tell. Anyway, the lace is a little different than the lace of the dress in the picture I found so I had to wear a sweetheart tank underneath to prevent showing any undergarments. Haha. I couldn't convince myself to be so daring for fashion just yet.

Unfortunately this is not a tutorial. My mannequin helped me tremendously in making this lace dress. This was the first time I made sleeves for a dress and I am so proud that I successfully executed the difficult task.


One of my favorite part of this dress is the exposed zipper back. Also a first time for this as well. I love the look of it-- makes the dress more edgy.


So here's just a few photos of how my ivory lace babydoll dress looks. I wore my coral rhinestone bordered earrings and nude heels. I kept it simple and elegant.


I adore this dress! It's cute and fun with such pretty elegance. One of my most favorite dresses I've made thus far. :)


Read More

Friday, January 4, 2013

Marvelous Accessories DIY: Gold Sequin Collar Necklace

My lack of DIY posts will hopefully change in the next couple of weeks. With the holidays behind us I have more time to explore more of my creative side AND I have been brainstorming some new ideas so I'm excited to share with you all!

I've been obsessing and drooling over collar necklaces. They are such a big ordeal this fashion season so I HAD to make one. Sequins... oh a girl can never go wrong with it. And lace... I don't even have to explain myself. They are my weakness, indeed!


So, the supplies you'll need: Paper, felt ($0.25 each), sequins & lace trim ($1.50 each after 50% off sale), tacky glue ($2.47), pencil, needle and thread. I purchased most of my supplies from Hobby Lobby.


Start off with a sketch of the collar. Whatever style or size you desire.


Cut out the pattern and place it on the felt to cut out the design.


Sew the lace onto the collar for the necklace tie.


Take your tacky glue and spread it evenly throughout one side of the collar. Take your sequin trim and start on the bottom layering it back and forth to cover the felt. Be sure to place a towel or paper towel underneath the felt because the tacky glue can seep through. It did on me, oops!

Here I already finished one side and started on the other side.


After the felt is all covered with the sequin trim let the collar necklace sit over night so the tacky glue can dry.


The following day... Taaa-daaaAA!


Easy-peasy and so pertyyyy!!! To keep it simple I wore a black loose fitting top, light denim jeans, and blush wedges. Oh, and my rose gold watch. The sequin collar necklace really stands out. :)


I'm in loooove with this sequin collar necklace. I will certainly be making more of these babies but with different materials. :)


Read More
Powered by Blogger.

© Classy Peach, AllRightsReserved.

Designed by ScreenWritersArena